はじめに
ここ1か月程度でVPNの構築を行っていました。これはうまく成功したので、今度はどこのパソコンでもアクセスできるNASが欲しくなりました。
今回はそんなNAS構築のお話をします。
準備
既存のNASの問題点
実は2015年にNASを購入したことがありました。
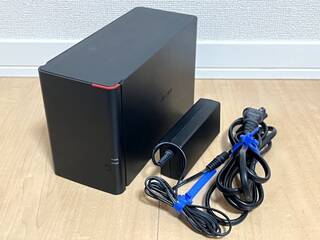
- BUFFALO リンクステーション RAID機能搭載 ネットワーク対応HDD 4TB LS420D0402
- 2TBのHDD2台構成、ネットワークで上でSMB構築可能、ユーザー作成対応、RAID設定可能
ただ、次のような問題があり常時起動はしないという運用方法をとっていました。
- 交換用のHDDが高い
- ここにリストがあるのですが、LS420Dの2TBの交換品であるOP-HD2.0T/LSが30800円する。当時AmazonでこのNASを31800円で購入したのですが、この中に入っている2台のHDDのうち1台を交換するだけで30800円もかかるんです。というわけで、故障時にかかる費用が割高なのです。
- 内部基板が故障時のリスクが高い
- NASはHDDとそれを動かすための基板があります。この基板の中で、各HDDをRAID設定したり、ユーザー管理したり、SMBでネットワーク上で見えるようにしたりしているわけなのですが、ではこの頭をもつ基盤が故障したらどうするかという部分が怖いというのがありました。BUFFALOでは内部基板が故障した際は、復旧サービスを行う必要があるのですが、例えばLS420Dの場合は、HDD搭載2ドライブモデルなのですが結構な金額がかかるのです。
- 連続稼働の音がうるさい
- これはサーバーの宿命ではあるのですが、HDDの回転音、内部基板用のファンの音がするため、自宅内に常時稼働させるとやはり気になります。
これらの問題から、新たにNASを構築したいと考えました。
自作NASの準備
ドライブ
今回は、音が静音のNASを作りたいため、2.5インチのSSDを選択しました。SSDは2015年に比べて安くなっていますし、静音、消費電力が低い、意外に長寿命というわけで、おススメとなっています。
2TB1万円の激安なのもありますが、RAID組むとはいえ、NASなので安定のSANDISKを購入。壊れる時期をずらすために別のメーカーなどにしたほうがいいとかありますが、SSDはウェアレベリングがありますし、そこまで同時に壊れることはないと思うため、2台同製品を購入しました。

さらに、このドライブをUSBへ変更するために、2.5インチ用のSSDケースを購入。このケースはRAID1機能を内蔵しているため、NAS構築を行うPC側でRAIDをしなくてもよいというメリットがあります。
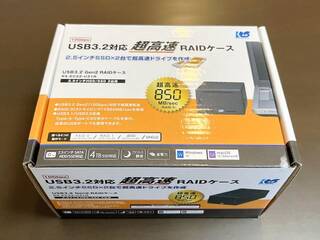
ケースとの比較にはなりますが、BUFFALOのNASよりコンパクトでとても良いです。

RAID1は、後ろのDIPスイッチの設定で自動で動作するようになります。
NAS構築のための常時稼働PC
今回、常時稼働PCで用意した機器(=自宅で転がっていた未使用PC)は以下となります。
- CHUWI LarkBox Pro
- 発売:2021年
- OS:Windows 11 Pro 64bit
- CPU:Celeron J4125
- メモリ:8GB
- ROM:EMMC 128GB
- USB端子:USB 3.0
- 有線LAN端子がないため、USB LANを接続する
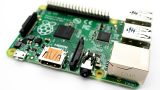
- Raspberry Pi 1 Model B+ (Plus)
- 発売:2014年
- OS:Raspbian 32bit
- CPU:ARM1176JZF-S 700MHz, ARMv6
- メモリ:512MB
- ROM:SDカード
- USB端子:USB 2.0
Windows で NAS 作り
最初に試したのは、CHUWIの小型WindowsPCとなります。なぜラズパイを使わなかったかというと、ラズパイのCPUには暗号化用の補助がないため、有効化する処理が重たくなるからという理由です。
Windows の NAS 設定
Windows 11 でアカウント制御ありのNASの設定を行ってみます。手順は次の通りです。
- SSDをUSBでPCに接続して、NTFSでフォーマットします。
- exFATの選択肢もありますが、Windowsの最大限の機能を使用したいために、NTFSを選択しました。
- 追加したいアカウント名のユーザーをユーザー追加します。
- ユーザー追加するときに秘密の質問を登録する必要があるのですが、最初のユーザー追加ではパスワードを無しにして、ユーザー追加後にパスワードを登録することで、秘密の質問の設定を回避できます。
- USBで接続した外付けSSDに対して、フォルダを1つ作ります。(アカウント専用のフォルダとする)
- フォルダを右クリックして、共有フォルダの設定をして、アクセス権限に追加したいアカウントを追加します。
これで、NASの設定は行えます。
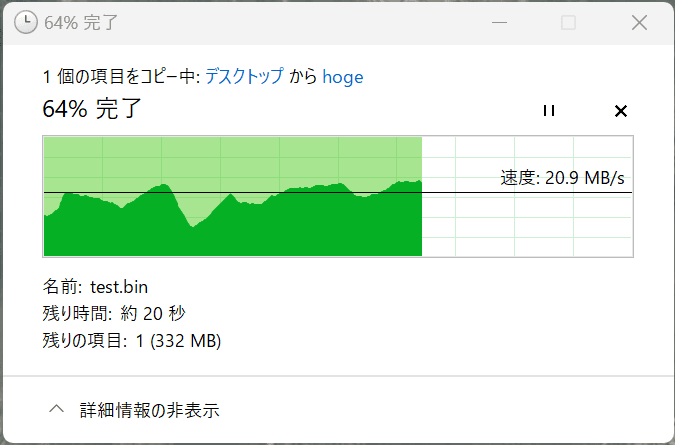
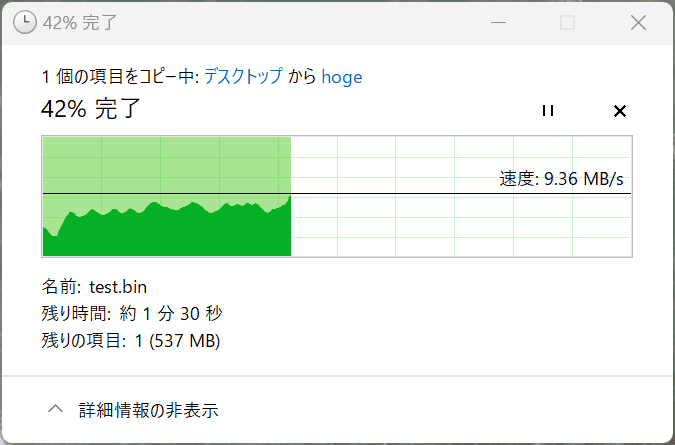
速度が出ないトラブルが発生
なぜか速度が出ず(2MB/秒~3MB/秒)
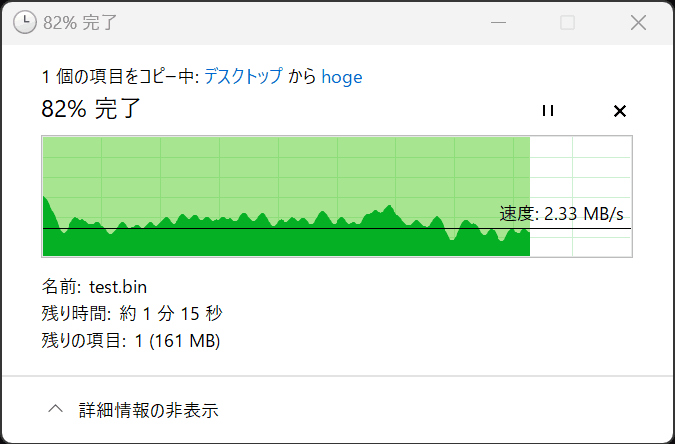
色々やったのですがうまくいかず・・・。
切り分けでは以下についてを確認しました。
- NASのWindows上からUSBケーブルで接続したSSDへファイルをコピー
- 200MB/秒ほどでた。外部SSDやUSBケーブルへの問題はなし。
- NASのWindowsPCと、NASへ接続したいWindowsPCとの間でiperf通信速度を確認
- 後述のiperfを用いて十分な速度が出ていることを確認。ネットワーク上の問題はなし。
- CPU使用率の確認
- 10%もなく特に処理不可になっているように見えない。CPU負荷上の問題はなし。
試したことは以下の通りです。何も速度は変わりませんでした。
- Windows セキュリティの対象フォルダから監視を外す
- SMB 1.0 を無効化する
- 処理の優先を「バックグラウンドサービス」にする
原因判明
WireGuardをオフにしたところ速度が復旧しました。
以下は、VPNをつなげた状態で転送した場合のラズパイ4のWireGuardサーバー側の負荷の状況です。
top - 22:52:52 up 5 days,  5:48,  2 users,  load average: 0.80, 0.38, 0.15
Tasks: 153 total,   3 running, 150 sleeping,   0 stopped,   0 zombie
%Cpu0  :   0.0/20.6   21[                                 ]
%Cpu1  :   0.0/22.6   23[                                 ]
%Cpu2  :   0.0/18.8   19[                                 ]
%Cpu3  :   0.0/25.4   25[                                 ]
MiB Mem :  4.8/3794.3   [|||||                            ]
MiB Swap:  0.0/100.0    [                                 ]
    PID USER      PR  NI    VIRT    RES    SHR S  %CPU  %MEM     TIME+ COMMAND
  31834 root      20   0       0      0      0 I  16.9   0.0   0:08.11 kworker/3:2-wg-crypt-wg0
  31926 root      20   0       0      0      0 R  15.2   0.0   0:23.56 kworker/1:3-wg-crypt-wg0
  31924 root      20   0       0      0      0 R  12.6   0.0   0:03.49 kworker/2:2-wg-crypt-wg0
  31928 root      20   0       0      0      0 I  12.6   0.0   0:18.32 kworker/0:3-wg-crypt-wg0
  31863 root      20   0       0      0      0 I   4.6   0.0   0:04.65 kworker/3:3-wg-crypt-wg0
  31841 root      20   0       0      0      0 I   4.3   0.0   0:03.99 kworker/3:0-wg-crypt-wg0
  31847 root      20   0       0      0      0 I   2.6   0.0   0:03.15 kworker/1:2-wg-crypt-wg0
  31835 root      20   0       0      0      0 I   2.3   0.0   0:05.51 kworker/1:1-wg-crypt-wg0
     14 root      20   0       0      0      0 S   2.0   0.0   0:11.26 ksoftirqd/0
  31836 root      20   0       0      0      0 I   1.7   0.0   0:02.31 kworker/0:1-wg-crypt-wg0
  31891 root      20   0       0      0      0 I   1.7   0.0   0:01.07 kworker/0:2-wg-crypt-wg0
  31838 root      20   0       0      0      0 I   0.7   0.0   0:01.33 kworker/2:0-wg-crypt-wg0
  31927 root      20   0       0      0      0 I   0.7   0.0   0:15.79 kworker/2:3-wg-crypt-wg0
  31929 natade    20   0    9844   3300   2700 R   0.7   0.1   0:00.47 top
     20 root      20   0       0      0      0 S   0.3   0.0   0:01.29 ksoftirqd/1
     25 root      20   0       0      0      0 S   0.3   0.0   0:00.69 ksoftirqd/2
  31900 root      20   0       0      0      0 I   0.3   0.0   0:22.77 kworker/3:1-wg-crypt-wg0
      1 root      20   0  165224  10104   7340 S   0.0   0.3   0:11.30 systemd
      2 root      20   0       0      0      0 S   0.0   0.0   0:01.00 kthreadd
WireGuardを入れての運用を考えていたのですが、負荷が思ったより大きいようで考え物です。
Linux で NAS 作り
LinuxでもNAS作りをしてみました。
Linux の NAS 設定
アカウント制御ありのNASの設定を行ってみます。手順は次の通りです。
外部ディスクをフォーマットしてアンマウントする
外部ディスクは大容量のためexFATを使用します。Raspberry Pi の Raspbian では exFAT がマウントできないです。
natade@test:/mnt $ sudo mount -t auto /dev/sda1 /mnt/disk/
mount: /mnt/disk: unknown filesystem type 'exfat'.
そこで次のソフトをインストールします。インストール後に再起動(sudo reboot)しないと、なぜか有効にならないので再起動します。(再起動が必要というのは、ググっても情報がなかったので初期のRaspberry Pi 1だからとか?)
sudo apt-get install exfat-fuse exfat-utils
sudo reboot
接続したUSBドライブのsda1を初期化します。
natade@test:/mnt $ lsblk -f
NAME FSTYPE FSVER LABEL UUID FSAVAIL FSUSE% MOUNTPOINT
sda
└─sda1
mmcblk0
├─mmcblk0p1 vfat FAT32 bootfs CEE7-0DF0 204.6M 20% /boot
└─mmcblk0p2 ext4 1.0 rootfs ebadab55-bd70-46a9-8f18-995c136fb5b2 26.4G 5% /
gdiskを使用します。パーティションの作成は、oとなります。途中色々入力があるのですが、Hex code or GUID (L to show codes, Enter = 8300): 0700の0700の入力以外は、デフォルト(エンターで省略)とします。
natade@test:/mnt $ sudo gdisk /dev/sda
GPT fdisk (gdisk) version 1.0.6

The protective MBR's 0xEE partition is oversized! Auto-repairing.

Partition table scan:
  MBR: protective
  BSD: not present
  APM: not present
  GPT: present

Found valid GPT with protective MBR; using GPT.

Command (? for help): o
This option deletes all partitions and creates a new protective MBR.
Proceed? (Y/N): y

Command (? for help): n
Partition number (1-128, default 1):
First sector (34-3906994143, default = 2048) or {+-}size{KMGTP}:
Last sector (2048-3906994143, default = 3906994143) or {+-}size{KMGTP}:
Current type is 8300 (Linux filesystem)
Hex code or GUID (L to show codes, Enter = 8300): 0700
Changed type of partition to 'Microsoft basic data'

Command (? for help): w

Final checks complete. About to write GPT data. THIS WILL OVERWRITE EXISTING
PARTITIONS!!

Do you want to proceed? (Y/N): y
OK; writing new GUID partition table (GPT) to /dev/sda.
The operation has completed successfully.
natade@test:/mnt $ lsblk -f
NAME        FSTYPE FSVER LABEL  UUID                                 FSAVAIL FSUSE% MOUNTPOINT
sda
└─sda1
mmcblk0
├─mmcblk0p1 vfat   FAT32 bootfs CEE7-0DF0                             204.6M    20% /boot
└─mmcblk0p2 ext4   1.0   rootfs ebadab55-bd70-46a9-8f18-995c136fb5b2   26.4G     5% /


natade@test:/mnt $ sudo fdisk -l
...
Disk /dev/sda: 1.82 TiB, 2000381018624 bytes, 3906994177 sectors
Disk model: U31R RAID1
Units: sectors of 1 * 512 = 512 bytes
Sector size (logical/physical): 512 bytes / 512 bytes
I/O size (minimum/optimal): 512 bytes / 512 bytes
Disklabel type: gpt
Disk identifier: DB861FE8-B759-4F21-885F-280FB9C43568

Device     Start        End    Sectors  Size Type
/dev/sda1   2048 3906994143 3906992096  1.8T Microsoft basic data
次にexFATでフォーマットします。
natade@test:/mnt $ sudo mkfs -t exfat -n usb /dev/sda1
mkexfatfs 1.3.0
Creating... done.
Flushing... done.
File system created successfully.
最後にマウントします。
natade@test:~ $ cd /mnt
natade@test:~ $ mkdir ./disk
natade@test:~ $ sudo mount -t auto /dev/sda1 /mnt/disk/
natade@test:~ $ cd /mnt/disk/
gdisk補足
gdiskは次のような機能を持っている。
b back up GPT data to a file
c change a partition's name
d delete a partition
i show detailed information on a partition
l list known partition types
n add a new partition
o create a new empty GUID partition table (GPT)
p print the partition table
q quit without saving changes
r recovery and transformation options (experts only)
s sort partitions
t change a partition's type code
v verify disk
w write table to disk and exit
x extra functionality (experts only)
? print this menu
パーティションを削除するなら、dで削除もできる。
natade@test:/mnt $ sudo gdisk /dev/sda
GPT fdisk (gdisk) version 1.0.6

The protective MBR's 0xEE partition is oversized! Auto-repairing.

Partition table scan:
MBR: protective
BSD: not present
APM: not present
GPT: present

Found valid GPT with protective MBR; using GPT.

Command (? for help): d
Using 1

Command (? for help): 1
SAMBAの設定をする
SMBで共有フォルダを作るためにSambaをインストールします。
natade@test:/mnt/disk $ sudo apt-get install samba
Reading package lists... Done
Building dependency tree... Done
Reading state information... Done
...
After this operation, 104 MB of additional disk space will be used.
Do you want to continue? [Y/n] Y
NASへのアクセス用のhogeユーザーを追加します。pdbeditでSamba用のパスワードの設定をします。
sudo useradd -m hoge
sudo pdbedit -a hoge
外部ディスクに共有フォルダを用意しておきます。
natade@test:/mnt/disk $ mkdir ./hoge
hogeさんのアクセス設定を行います。具体的には、/etc/samba/smb.confに次の行を追加します。force userの設定は、hogeさんが共有フォルダ上で操作する際のLinux上のユーザーとなりますが、今回はここをrootとしてます。本当は、アカウントをhogeとしたいところですが、そのためにはマウント時に-o uid=<ユーザID>,gid=<グループID>でアカウントの設定が必要となります。今回は説明を省略します。
[hoge]
   path = /mnt/disk/hoge
   read only = no
   guest ok = no
   force user = root
   browseable = yes
あとはサービスを再起動させたら完了です。
sudo service smbd restart
今回は、速度を出したいため暗号化の設定は行いません。
速度が出ない・・・
速度は出ませんでした(これはローカルの速度。WireGuard越しだとおそらくさらにダウン)。
CPU使用率がいっぱいいっぱいだったので、やっぱりメモリ512MBのARM1176JZF-S 700MHzは厳しいようです。
top - 21:32:13 up 1 day, 6 min,  1 user,  load average: 2.24, 0.78, 0.32
Tasks: 100 total,   3 running,  97 sleeping,   0 stopped,   0 zombie
%Cpu(s):  7.3 us, 63.4 sy,  0.0 ni,  0.0 id, 25.0 wa,  0.0 hi,  4.3 si,  0.0 st
MiB Mem :    429.3 total,     97.6 free,     44.1 used,    287.5 buff/cache
MiB Swap:    100.0 total,     97.0 free,      3.0 used.    322.9 avail Mem

  PID USER      PR  NI    VIRT    RES    SHR S  %CPU  %MEM     TIME+ COMMAND
11081 root      20   0  101580  17184  14756 R  33.0   3.9   0:22.54 smbd
   69 root      20   0       0      0      0 D  10.3   0.0   0:27.80 usb-storage
  243 avahi     20   0    7140   3272   2556 S  10.3   0.7   6:26.62 avahi-daemon
   28 root      20   0       0      0      0 S   9.4   0.0   0:17.01 kswapd0
10798 root      20   0       0      0      0 R   7.9   0.0   0:07.89 kworker/u2:2+flush-8:0
11102 natade    20   0   11096   3096   2592 R   3.0   0.7   0:00.64 top
おわりに
NASは作れたのですが、WireGuardありの運用を考えていたので、速度が出なくて少し驚きました。Raspberry Pi は 4 なので現状ラズパイの中で最も強いはずなのですが、NASまで運用しようとすると力不足のようです。リモートデスクトップ程度なら問題ないんですけどもね。
負荷の軽減方法としては以下の通りでしょうか。
- NASをWireGuardのサーバー側に入れる。
- WireGuardのクライアント間同士の通信がなくなるため、少し早くなる可能性がある
- 小型PCを導入する。
- 最近だと、ノートPCなどより安い値段のインテル製CPUの小型PCが売っているのでそれをサーバー用途で使う
- SoftEther VPN といった別のVPNを試す。
VPNにNASも運用できるとずっと使い勝手が上がるので、なんとか常用できるような環境を構築していきたいですね。
参考スペック
| 機器 | CPU | コア | メモリ | ワット | Geekbench 5, 64bit (S) | Geekbench 5, 64bit (M) | Cinebench R23 (S) | Cinebench R23 (M) |
| Raspberry Pi 1 Model B+ (Plus) | ARM1176JZF-S | 1 | 512MB | 6W | – | – | – | – |
| Raspberry Pi 4 B | Broadcom BCM2711 | 4 | 4GB | 15W | 202 | 601 | – | – |
| CHUWI LarkBox Pro | Celeron J4125 | 4 | 8GB | 20W | 482 | 1632 | 444 | 1541 |
| Beelink Mini S12 Pro | Intel N100 | 4 | 16GB | 25W | 584 | 2084 | 901 | 2913 |
参考サイト
オマケ
iperfを使用したネットワーク調査
iperfを用いて、ネットワークの速度をより正確に調査できます。
iperf.frからiPerf 1.7.0をサーバーとクライアントに保存します。サーバー側では、ファイアウォールの設定で、iperf.exeのアクセスを許可にしておきます。サーバー側がRaspberry Piであれば、sudo apt-get install iperfでインストールできます。
サーバー側で以下を管理者権限で実行。クライアント側で以下を実行します。
- TCP
- サーバー:
iperf.exe -s -w 2m - クライアント:
iperf.exe -c x.x.x.x -w 2m -t 10s -i 1s
- サーバー:
- UDP
- サーバー:
iperf.exe -s -u - クライアント:
iperf.exe -c 192.168.114.49 -u -b 500m -t 10s -i 1s
- サーバー:
ローカルのネットワーク速度
自宅内の2つのPC間との通信速度です。
TCP
サーバー側
PS > .\iperf.exe -s -w 2m
------------------------------------------------------------
Server listening on TCP port 5001
TCP window size: 2.00 MByte
------------------------------------------------------------
[420] local 192.168.114.49 port 5001 connected with 192.168.114.27 port 59456
[ ID] Interval       Transfer     Bandwidth
[420]  0.0-10.0 sec   521 MBytes   435 Mbits/sec
クライアント側
PS > .\iperf.exe -c 192.168.114.49 -w 2m -t 10s -i 1s
------------------------------------------------------------
Client connecting to 192.168.114.49, TCP port 5001
TCP window size: 2.00 MByte
------------------------------------------------------------
[368] local 192.168.114.27 port 59456 connected with 192.168.114.49 port 5001
[ ID] Interval       Transfer     Bandwidth
[368]  0.0- 1.0 sec  42.2 MBytes   354 Mbits/sec
[368]  1.0- 2.0 sec  56.9 MBytes   477 Mbits/sec
[368]  2.0- 3.0 sec  52.8 MBytes   443 Mbits/sec
[368]  3.0- 4.0 sec  52.8 MBytes   443 Mbits/sec
[368]  4.0- 5.0 sec  52.4 MBytes   440 Mbits/sec
[368]  5.0- 6.0 sec  52.6 MBytes   442 Mbits/sec
[368]  6.0- 7.0 sec  52.1 MBytes   437 Mbits/sec
[368]  7.0- 8.0 sec  52.6 MBytes   441 Mbits/sec
[368]  8.0- 9.0 sec  53.3 MBytes   447 Mbits/sec
[368]  9.0-10.0 sec  53.1 MBytes   446 Mbits/sec
[368]  0.0-10.1 sec   521 MBytes   435 Mbits/sec
UDP
サーバー側
PS > .\iperf.exe -s -u
------------------------------------------------------------
Server listening on UDP port 5001
Receiving 1470 byte datagrams
UDP buffer size: 64.0 KByte (default)
------------------------------------------------------------
[356] local 192.168.114.49 port 5001 connected with 192.168.114.27 port 60725
[ ID] Interval       Transfer     Bandwidth       Jitter   Lost/Total Datagrams
[356]  0.0-10.0 sec   184 MBytes   154 Mbits/sec  1.581 ms 2555/133684 (1.9%)
クライアント側
PS > .\iperf.exe -c 192.168.114.49 -u -b 500m -t 10s -i 1s
------------------------------------------------------------
Client connecting to 192.168.114.49, UDP port 5001
Sending 1470 byte datagrams
UDP buffer size: 64.0 KByte (default)
------------------------------------------------------------
[376] local 192.168.114.27 port 60725 connected with 192.168.114.49 port 5001
[ ID] Interval       Transfer     Bandwidth
[376]  0.0- 1.0 sec  19.2 MBytes   161 Mbits/sec
[376]  1.0- 2.0 sec  19.4 MBytes   163 Mbits/sec
[376]  2.0- 3.0 sec  19.6 MBytes   164 Mbits/sec
[376]  3.0- 4.0 sec  18.5 MBytes   155 Mbits/sec
[376]  4.0- 5.0 sec  20.5 MBytes   172 Mbits/sec
[376]  5.0- 6.0 sec  17.7 MBytes   149 Mbits/sec
[376]  6.0- 7.0 sec  17.4 MBytes   146 Mbits/sec
[376]  7.0- 8.0 sec  18.9 MBytes   159 Mbits/sec
[376]  8.0- 9.0 sec  17.5 MBytes   147 Mbits/sec
[376]  9.0-10.0 sec  18.7 MBytes   157 Mbits/sec
インターネットのネットワーク速度
WireGuardを設置しているサーバーとのネットワークの通信速度です。
TCP
サーバー側
~ $ iperf -s -w 2m
------------------------------------------------------------
Server listening on TCP port 5001
TCP window size:  416 KByte (WARNING: requested 1.91 MByte)
------------------------------------------------------------
[  4] local x.x.x.x port 5001 connected with x.x.x.x port 63242
[ ID] Interval       Transfer     Bandwidth
[  4] 0.0000-10.2095 sec   104 MBytes  85.6 Mbits/sec
クライアント側
PS > .\iperf.exe -c *.*.* -w 2m -t 10s -i 1s
------------------------------------------------------------
Client connecting to *.*.*, TCP port 5001
TCP window size: 2.00 MByte
------------------------------------------------------------
[480] local 192.168.114.27 port 58791 connected with *.*.*.* port 5001
[ ID] Interval       Transfer     Bandwidth
[480]  0.0- 1.0 sec  11.8 MBytes  99.2 Mbits/sec
[480]  1.0- 2.0 sec  9.96 MBytes  83.6 Mbits/sec
[480]  2.0- 3.0 sec  10.3 MBytes  86.3 Mbits/sec
[480]  3.0- 4.0 sec  10.3 MBytes  86.4 Mbits/sec
[480]  4.0- 5.0 sec  10.3 MBytes  86.4 Mbits/sec
[480]  5.0- 6.0 sec  10.3 MBytes  86.4 Mbits/sec
[480]  6.0- 7.0 sec  10.3 MBytes  86.2 Mbits/sec
[480]  7.0- 8.0 sec  10.3 MBytes  86.4 Mbits/sec
[480]  8.0- 9.0 sec  10.3 MBytes  86.4 Mbits/sec
[480]  9.0-10.0 sec  10.3 MBytes  86.4 Mbits/sec
[480]  0.0-10.2 sec   104 MBytes  85.4 Mbits/sec
UDP
サーバー側
~ $ iperf -s -u
------------------------------------------------------------
Server listening on UDP port 5001
UDP buffer size:  208 KByte (default)
------------------------------------------------------------
[  3] local *.*.*.* port 5001 connected with *.*.*.* port 48384
[ ID] Interval       Transfer     Bandwidth        Jitter   Lost/Total Datagrams
[  3] 0.0000-10.0098 sec  97.6 MBytes  81.8 Mbits/sec   0.277 ms 87091/156691 (56%)
クライアント側
PS > .\iperf.exe -c *.*.* -u -b 500m -t 10s -i 1s
------------------------------------------------------------
Client connecting to *.*.*, UDP port 5001
Sending 1470 byte datagrams
UDP buffer size: 64.0 KByte (default)
------------------------------------------------------------
[484] local 192.168.114.27 port 52044 connected with *.*.*.* port 5001
[ ID] Interval       Transfer     Bandwidth
[484]  0.0- 1.0 sec  22.0 MBytes   185 Mbits/sec
[484]  1.0- 2.0 sec  22.2 MBytes   186 Mbits/sec
[484]  2.0- 3.0 sec  21.9 MBytes   184 Mbits/sec
[484]  3.0- 4.0 sec  22.0 MBytes   185 Mbits/sec
[484]  4.0- 5.0 sec  22.0 MBytes   185 Mbits/sec
[484]  5.0- 6.0 sec  21.8 MBytes   183 Mbits/sec
[484]  6.0- 7.0 sec  21.3 MBytes   178 Mbits/sec
[484]  7.0- 8.0 sec  22.1 MBytes   185 Mbits/sec
[484]  8.0- 9.0 sec  22.1 MBytes   185 Mbits/sec
[484]  9.0-10.0 sec  22.2 MBytes   186 Mbits/sec
[484]  0.0-10.0 sec   220 MBytes   184 Mbits/sec
WireGuard上でサーバーとの通信速度
NASではなく、WireGuardを設置しているサーバーへのネットワークの通信速度です。WireGuardはUDPで暗号化するので、TCPで確認します。(内部でUDPに変換される)
実際にNASとの接続はNAS⇔インターネット⇔サーバー⇔インターネット⇔クライアントとなるはずなので、10MB/secは出ていてもおかしくないように見えます(今回はここが2MB~5MBの速度になっていた)。
サーバー側
~ $ iperf -s -w 2m
------------------------------------------------------------
Server listening on TCP port 5001
TCP window size:  416 KByte (WARNING: requested 1.91 MByte)
------------------------------------------------------------
[  4] local 10.0.0.1 port 5001 connected with 10.0.0.20 port 58850
[ ID] Interval       Transfer     Bandwidth
[  4] 0.0000-10.1964 sec  91.8 MBytes  75.5 Mbits/sec
クライアント側
PS > .\iperf.exe -c 10.0.0.1 -w 2m -t 10s -i 1s
------------------------------------------------------------
Client connecting to 10.0.0.1, TCP port 5001
TCP window size: 2.00 MByte
------------------------------------------------------------
[372] local 10.0.0.20 port 58850 connected with 10.0.0.1 port 5001
[ ID] Interval       Transfer     Bandwidth
[372]  0.0- 1.0 sec  11.1 MBytes  93.1 Mbits/sec
[372]  1.0- 2.0 sec  7.69 MBytes  64.5 Mbits/sec
[372]  2.0- 3.0 sec  9.02 MBytes  75.7 Mbits/sec
[372]  3.0- 4.0 sec  9.55 MBytes  80.2 Mbits/sec
[372]  4.0- 5.0 sec  9.55 MBytes  80.2 Mbits/sec
[372]  5.0- 6.0 sec  9.56 MBytes  80.2 Mbits/sec
[372]  6.0- 7.0 sec  9.55 MBytes  80.2 Mbits/sec
[372]  7.0- 8.0 sec  9.55 MBytes  80.2 Mbits/sec
[372]  8.0- 9.0 sec  8.33 MBytes  69.9 Mbits/sec
[372]  9.0-10.0 sec  7.87 MBytes  66.0 Mbits/sec
[372]  0.0-10.2 sec  91.8 MBytes  75.4 Mbits/sec
コメント